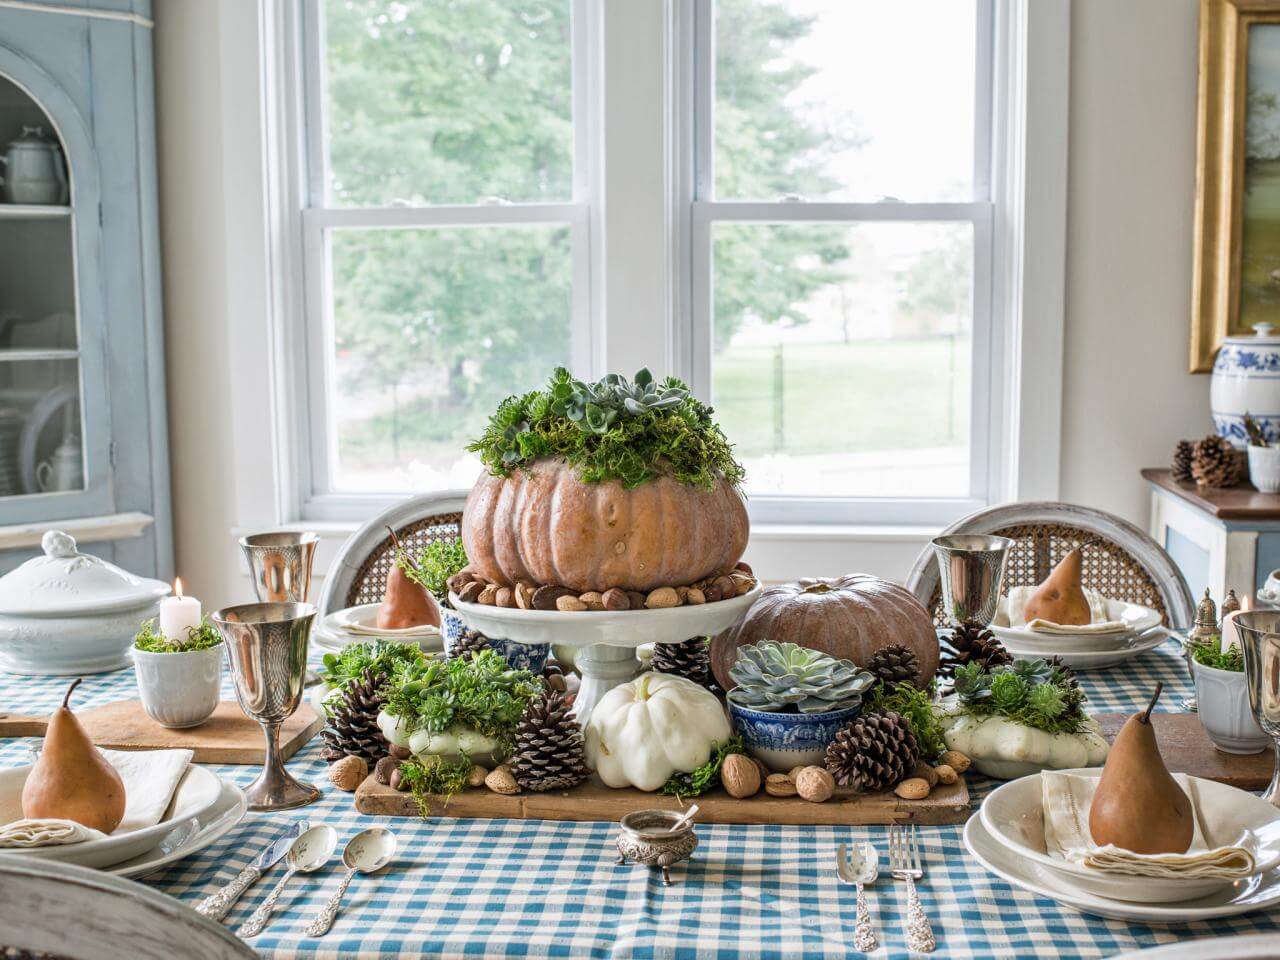
It’s fall again, and that means falling leaves, falling temperatures, and of course fall pumpkins! What better way to celebrate the changing season than with a DIY pumpkin planter? These charming decor pieces can take the place of a jack-o’-lantern on the stairs or look right at home as a table centerpiece.
“I would rather sit on a pumpkin and have it all to myself, than be crowded on a velvet cushion.” - Henry David Thoreau
The Basic Design

Making a pumpkin planter is a 100% natural way to create a self-composting pot to house your plants in. While this article mostly focuses on succulents, you can put whatever you want in your self contained planter. Here’s how to create one yourself.
- Cut a hole in the top, like a jack-o’-lantern
- Remove the seeds and guts (also great for composting)
- Add soil into the hollowed out pumpkin
- Plant your succulents or flowers in the pumpkin
- Decorate with smaller pumpkins or gourds
The Table Centerpiece

Another great example of how to use gourds in unique ways is to have make fall centerpieces. This can probably last until Thanksgiving dinner, depending on certain conditions. These types of DIY decor tend to look best with exotic white pumpkins.
You Will Need:
- Spanish moss (other moss is fine, but Spanish seems to work best)
- Cactus soil (again, seems to work best)
- Succulents
- Pen
- Terracotta pot
- Carving tool
- Pumpkin (preferable white)
Use the terracotta pot to draw a circle on the pumpkin along the rim. This will give you the approximate width of the planter’s top. Then just follow the basic design steps we’ve already laid out for you. You’ll be crafting pumpkin centerpieces in no time.
Decor with Succulents

Succulents are best suited to live in a hollowed out pumpkin because of the way they absorb moisture. They like to have water around their roots, but also to have dry soil in between their roots. Proper succulent care can allow your planter to have a long life until it needs to be put in the ground.
How to Care for Your Succulent Pumpkin Arrangement:
- Light - Succulents need 6-12 hours of sunlight daily
- Soil - Dry cactus circle works best
- Fertilizer - Not required
- Water - Water thoroughly, but not in between the roots
- Planting - You can simply bury the pumpkin
Arts and Crafts Time

There’s also a way to create a longer lasting pumpkin succulent harvest decoration with simple spray adhesive. This means that your natural decor can survive the fall season.
Start by spraying the top of the pumpkin with the adhesive, this will help seal the gourd and prolong its lifespan.
You will need:
- Spray adhesive
- Pumpkin
- Hot glue gun
- Moss
- Clear gel crafts glue
- Succulents
Instructions:
Pumpkins with flat tops seem to work the best, but spraying the adhesive over the pumpkin and then dotting it with moss is the first layer. Your succulent pumpkin arrangement can then have the succulents hot glued on for a more natural look. Then use the clear gel to glue plants onto those plants, creating a cornucopia of fall colors. Your friends and guests will marvel at the decor.
As a Garden Planter

Ultimately, this is where your succulent pumpkin centerpiece is most likely going to end up, so why not create a special planter just for this case? Just like before, cut open the top and scoop out the seeds, while planting decedent succulents into the pumpkin. This makes a completely biodegradable planter that you can just dig a hole for in the backyard.
Furthermore:
A DIY pumpkin planter can be an amazing piece of decor in the home and a natural way to plant succulents once it begins to decay. The planter will act as a sort of fertilizer for the succulent. This makes it much easy to transition from an interior piece to a plant in your garden.
Any fall tips and tricks you’d like to share? Let us know in the comments below! Don’t forget to follow us on Facebook for more great tips and inspiration!
Continue Reading:
