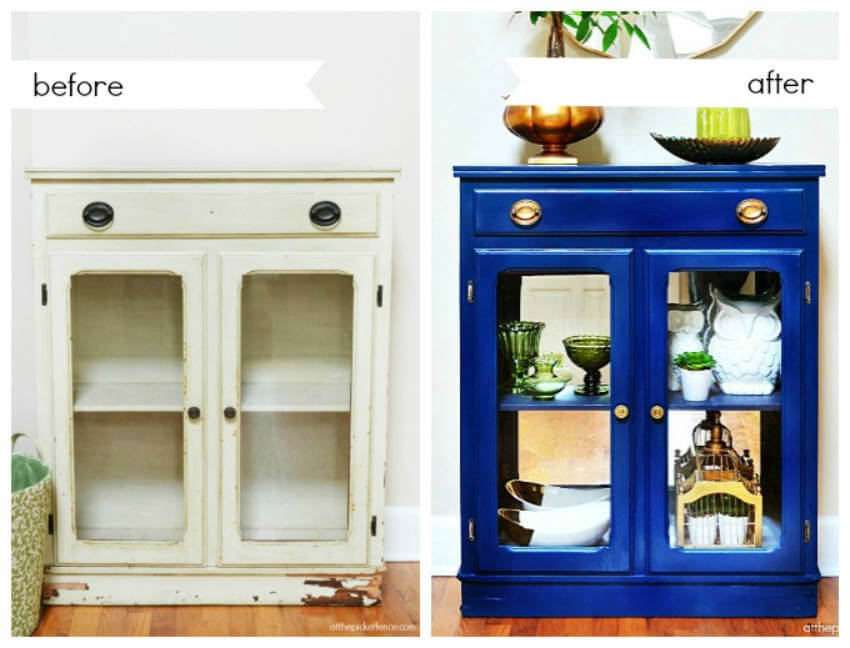
Every now and then we feel like buying new furniture to replace our old looking pieces, but that can come with a hefty price tag. Now, what if you could learn how to paint furniture at home and make it brand new again? This is what we’re bringing you today: the beginner’s guide to renew and paint your furniture DIY style!
“The only time I feel alive is when I'm painting.” ― Vincent van Gogh
Cleaning

Properly painting old furniture begins with cleaning it! Start by taking off drawers - if the furniture has any - from the piece you’re working on. You’ll want to clean, sand, and paint the pieces separately. A wet cloth normally does the trick here, but if the furniture is really dirty you can also use water and soap. To finish it up, a tack cloth can come in handy since it will wipe off any remaining dust or dirt.
Sanding

Not all furniture needs this step - there are some kinds of paint that adhere directly to the surface and won’t peel off that easily.
However, keep this in mind:
If you’re not sure about the type of furniture or paint you’re using, it’s nice to complete this step as well. In addition, use a tack cloth after sanding to remove any dust that may build up during the process.
Priming

A layer of primer is important especially for wood furniture - since wood absorbs very easily, a coat of primer before painting will prevent you from having to do a bunch of paint coats afterwards. It will help cover stains or discolorations in wood too. But there are also a couple of types of paint that don’t require primer to be used, so pay attention to the type you’re using!
Painting

There are three ways you can paint your furniture:
- Using spray paint
- Using a brush
- Using a roller
All of these ways have their advantages, and you can even combine them. The brush can cover smaller edges and tricky places to reach. Meanwhile, the roller can do most of the work since it won’t leave the streaks that a brush might. To top it all and leave a flawless look, use a coat of spray paint! If you’re thinking applying thick coats of paint will minimize your work, think again!
Here’s a tip for you:
Apply thin coats of paint! This way it will dry faster while also giving it a plainer look.
If you’re really not keeping the furniture, make sure to call a local junk removal service in order to have a proper disposal.
Sealing

Once you’ve learned how to sand and paint furniture and completed the steps above, you can now finish your DIY project with a coat of sealing! Sealing is not essential, but it is worth the time.
And here’s why:
It’ll provide your furniture with extra protection that will make it last longer. You can either use polyacrylic or paste wax to complete this step. After applying it to the furniture piece, let it dry for about two or three weeks!
Related:
- 5 Tricks To Make Your Old Furniture Look Like New Again
- Make Your Own DIY Pergola At Any Budget
- 5 Ways To Build Your Own Hammock At Home
- Make Your Own Chicken Coop With This Simple Guide
- 7 Awesome DIY Picnic Table Ideas You Can Make On A Weekend
- 4 Summer Projects That Will Completely Transform Your Home
- 8 DIY Headboards You Can Make In One Day
What kind of furniture are you trying to paint? Share your thoughts and questions in the comments below and find more DIY & Decor ideas on our Inspiration page!
